
1、基于DockFile制作一个springboot镜像,并上传阿里镜像仓库
该步骤省略
这里提前制作了一个:
registry.cn-hongkong.aliyuncs.com/wushusong/jm-cloud:wss-demo
2、创建wss-demo.yaml
2.1 创建阿里云镜像密钥
步骤1:创建Secret
假设你的阿里云镜像库地址为registry.cn-hangzhou.aliyuncs.com,用户名和密码分别为你的阿里云账号的用户名和密码(或者使用访问凭证)。
使用以下命令创建Secret:
bash
kubectl create secret docker-registry aliyun-registry-secret \
  --docker-server=registry.cn-hangzhou.aliyuncs.com \
  --docker-username=your_username \
  --docker-password=your_password \
--docker-email=your_email@example.com--docker-server: 阿里云镜像库的地址,根据你的实际仓库地址修改(例如registry.cn-beijing.aliyuncs.com等)。--docker-username: 你的阿里云账号用户名(或AccessKey ID)。--docker-password: 你的阿里云账号密码(或AccessKey Secret)。--docker-email: 你的邮箱(可选,但Kubernetes要求提供,可以任意指定)。
注意:如果你使用的是阿里云容器镜像服务,那么用户名和密码可以是你的阿里云账号的AccessKey ID和AccessKey Secret(建议使用子账户的AccessKey,并授予相应的权限)。
步骤2:在YAML文件中使用imagePullSecrets
在Pod或Deployment的YAML文件中,通过imagePullSecrets字段引用刚才创建的Secret。
示例Deployment YAML:
yaml
apiVersion: apps/v1
kind: Deployment
metadata:
  name: my-app
spec:
  replicas: 1
  selector:
    matchLabels:
      app: my-app
  template:
    metadata:
      labels:
        app: my-app
    spec:
      containers:
      - name: my-app-container
        image: registry.cn-hangzhou.aliyuncs.com/your_namespace/your_image:tag
        ports:
        - containerPort: 80
      imagePullSecrets:
      - name: aliyun-registry-secret  # 这里使用之前创建的Secret
步骤3:应用YAML文件
使用kubectl apply命令创建资源。
bash
kubectl apply -f your-deployment.yaml注意事项
确保Secret和Pod/Deployment在同一个命名空间(namespace)中。如果不在同一个命名空间,需要在创建Secret时指定命名空间,并在Pod/Deployment的YAML中指定相同的命名空间。
如果你需要在多个命名空间中使用,需要在每个命名空间中创建相同的Secret。
2.2 创建应用yaml文件
该步骤可以让deepseek写
要求如下:
帮我写一个k8s部署springboot项目的yaml配置,要求如下:
1、imagePullSecrets的name是aliyun-registry-secret
2、镜像地址是:registry.cn-hongkong.aliyuncs.com/wushusong/jm-cloud:wss-demo
3、运行的podName是:wss-demo
4、服务内部端口:31012,容器对外访问的端口是31022
1、带健康检查版本,需要springboot项目中集成actuator
apiVersion: apps/v1
kind: Deployment
metadata:
  name: wss-demo
  labels:
    app: wss-demo
spec:
  replicas: 1
  selector:
    matchLabels:
      app: wss-demo
  template:
    metadata:
      labels:
        app: wss-demo
    spec:
      imagePullSecrets:
      - name: aliyun-registry-secret
      containers:
      - name: wss-demo
        image: registry.cn-hongkong.aliyuncs.com/wushusong/jm-cloud:wss-demo
        ports:
        - containerPort: 31012
        env:
        - name: SERVER_PORT
          value: "31012"
        resources:
          requests:
            memory: "512Mi"
            cpu: "250m"
          limits:
            memory: "1024Mi"
            cpu: "500m"
        livenessProbe:
          httpGet:
            path: /actuator/health
            port: 31012
          initialDelaySeconds: 60
          periodSeconds: 10
        readinessProbe:
          httpGet:
            path: /actuator/health
            port: 31012
          initialDelaySeconds: 30
          periodSeconds: 5
---
apiVersion: v1
kind: Service
metadata:
  name: wss-demo-service
spec:
  selector:
    app: wss-demo
  ports:
  - name: http
    port: 31012
    targetPort: 31012
    nodePort: 31022
  type: NodePort
2、不带健康检查版本
apiVersion: apps/v1
kind: Deployment
metadata:
name: wss-demo
labels:
app: wss-demo
spec:
replicas: 1
selector:
matchLabels:
app: wss-demo
template:
metadata:
labels:
app: wss-demo
spec:
imagePullSecrets:
- name: aliyun-registry-secret
containers:
- name: wss-demo
image: registry.cn-hongkong.aliyuncs.com/wushusong/jm-cloud:wss-demo
ports:
- containerPort: 31012
env:
- name: SERVER_PORT
value: "31012"
resources:
requests:
memory: "512Mi"
cpu: "250m"
limits:
memory: "1024Mi"
cpu: "500m"
---
apiVersion: v1
kind: Service
metadata:
name: wss-demo-service
spec:
selector:
app: wss-demo
ports:
- name: http
port: 31012
targetPort: 31012
nodePort: 31022
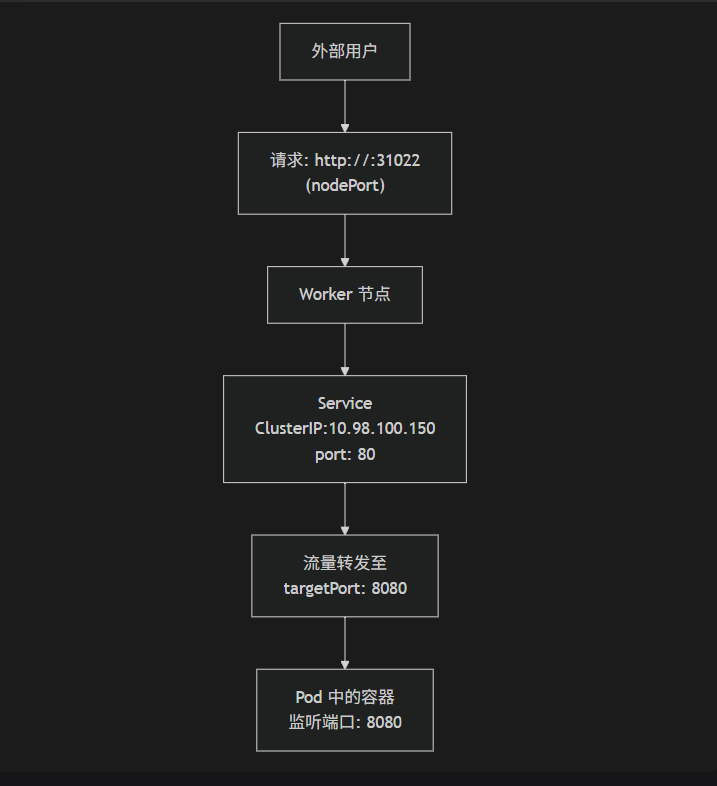
type: NodePort2.3、各个端口区别
apiVersion: v1
kind: Service
metadata:
  name: wss-demo-service
spec:
  selector:
    app: wss-demo  # 通过这个标签找到要代理的 Pod
  ports:
  - name: http
    port: 31012      # 【Service 端口】集群内其他服务通过 `wss-demo-service:31012` 访问我
    targetPort: 31012 # 【目标端口】请求转发到 Pod 的 31012 端口(您的 Spring Boot 应用实际监听的端口)
    nodePort: 31022   # 【节点端口】外部用户通过 `<任何节点IP>:31022` 访问
  type: NodePort      # 设置了 nodePort,type 必须是 NodePort 或 LoadBalancer
集群内部访问 (通过 Service
port)另一个 Pod 内部:
curl http://wss-demo-service:31012
集群外部访问 (通过
nodePort)浏览器或外部命令:
http://<任何一个Worker节点的IP地址>:31022
直接访问 Pod (不推荐,仅用于调试)
知道 Pod IP 的情况下:
http://<Pod_IP>:31012(targetPort)
重要总结
port是 Service 的门牌号(集群内)。targetPort是 Pod 的门牌号(容器内)。nodePort是整个大楼(节点)的门牌号(集群外)。port和nodePort是 Service 的配置,而targetPort指向的是 Pod 的配置。务必确保targetPort与您容器中应用程序实际监听的端口完全一致,否则会出现“连接拒绝”的错误。
3、运行
kubectl apply -f wss-demo-3.yaml
查看pod
kubectl get pods -o wide
查看service
kubectl get service
4、测试
因为前一篇文章[k3s部署]中,设定了外部访问IP:192.168.15.171(本机IP)
访问成功

查看pod日志
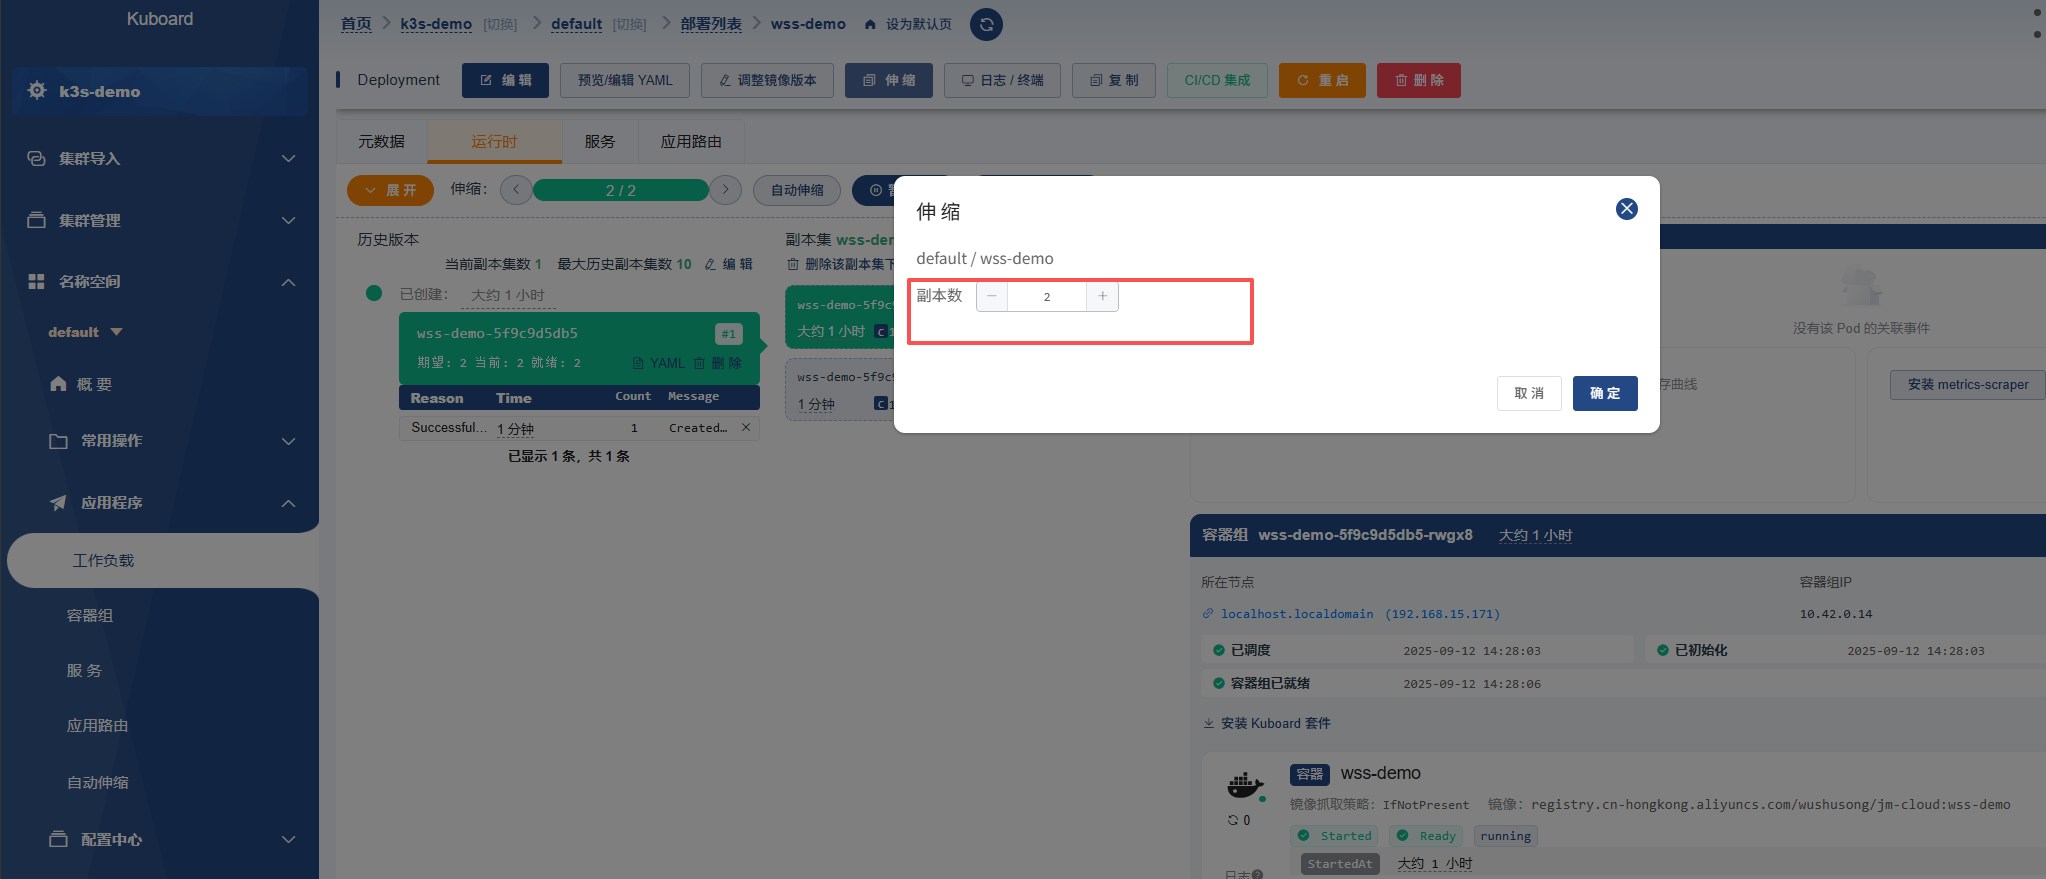
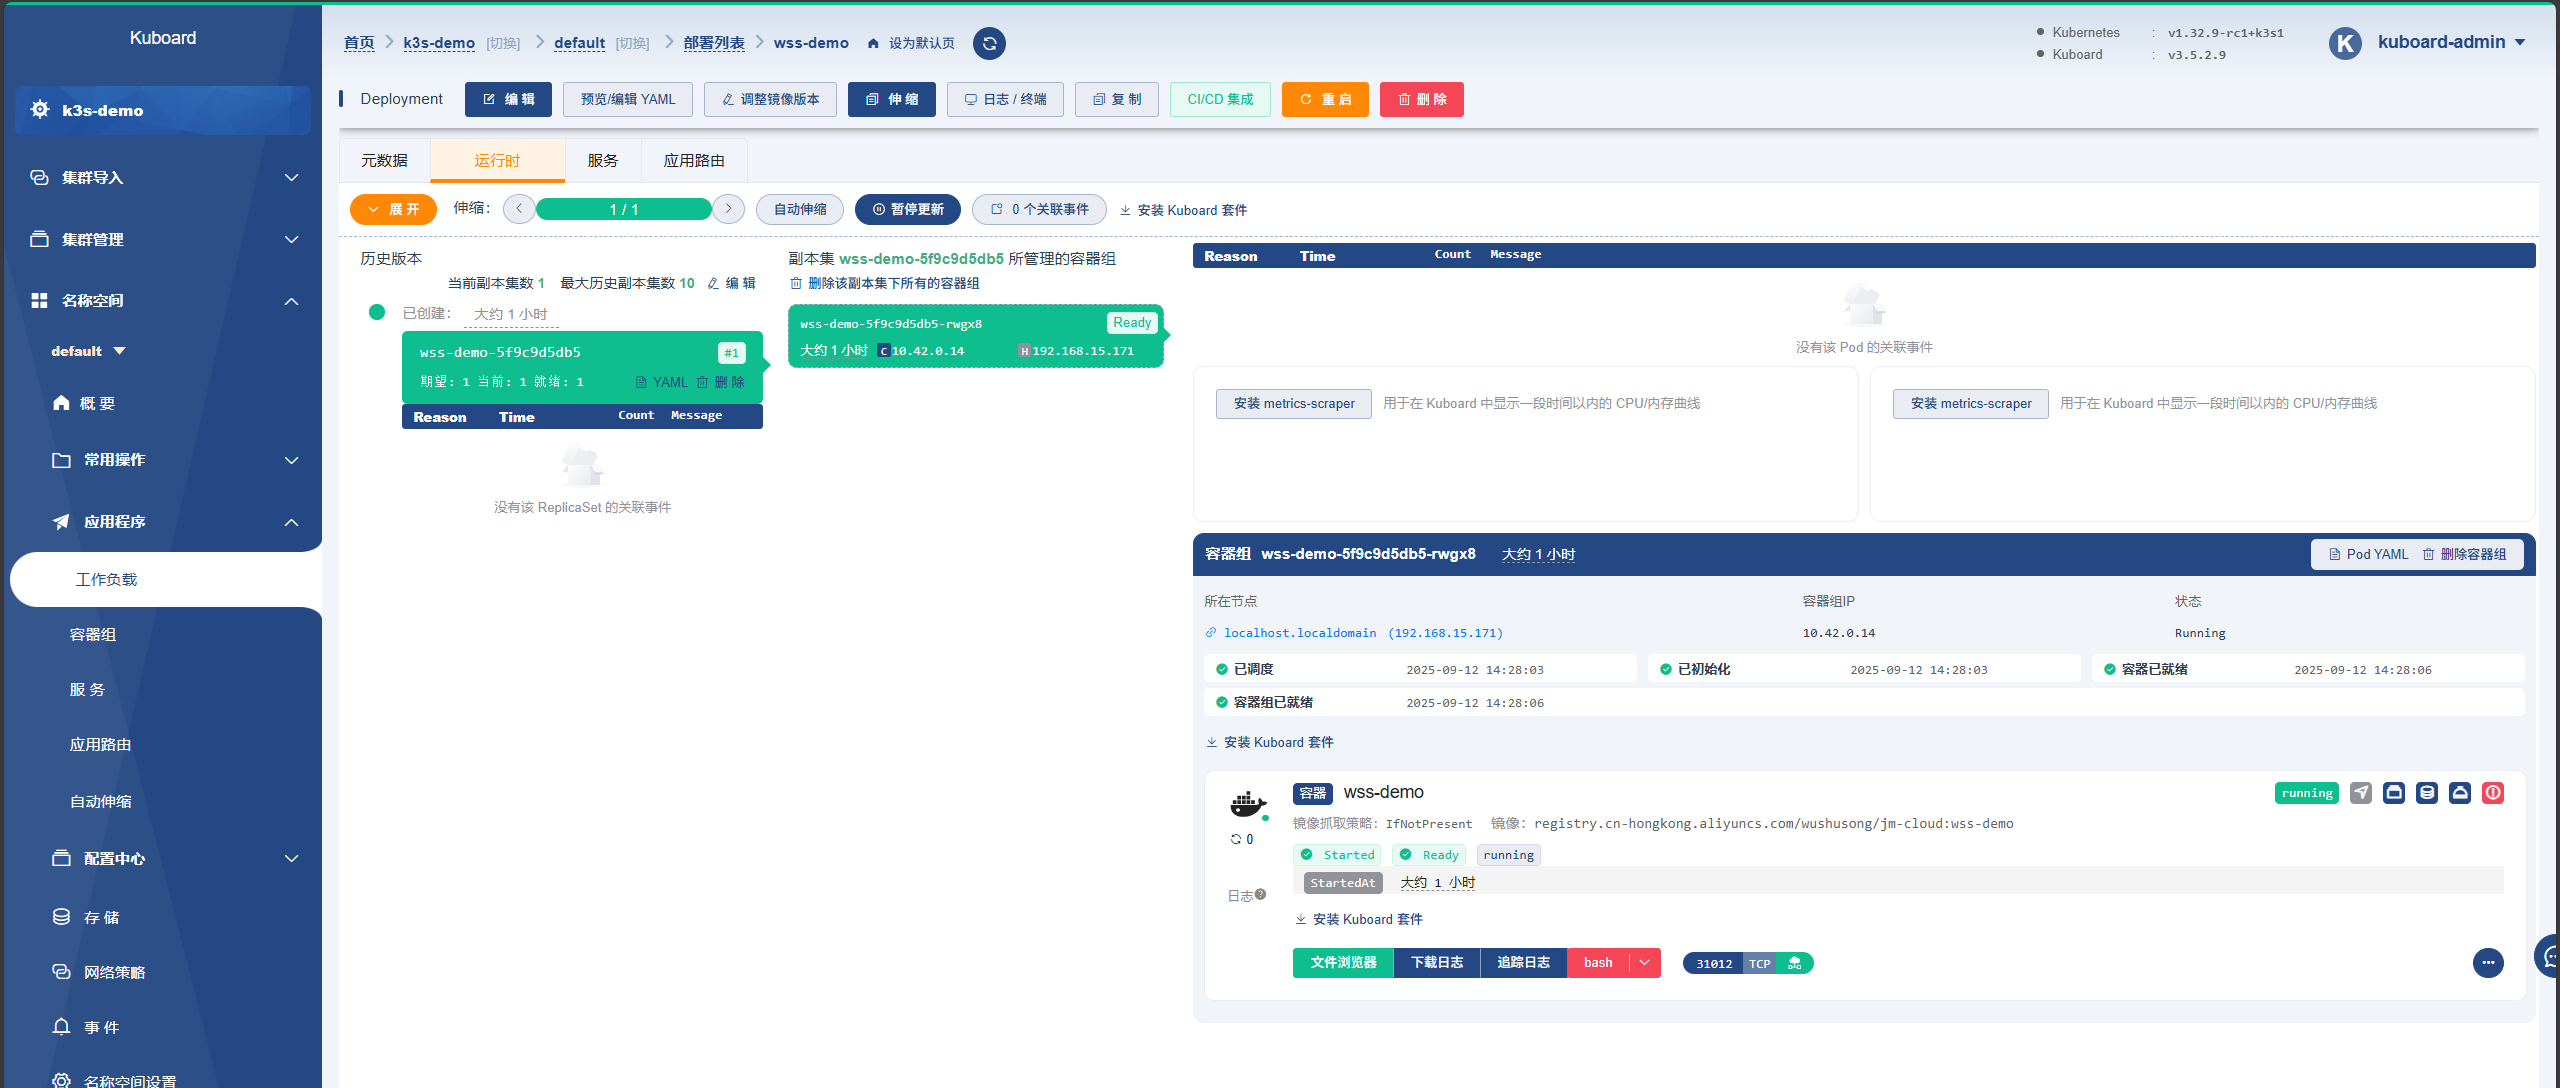
kubectl logs -f wss-demo-5f9c9d5db5-rwgx8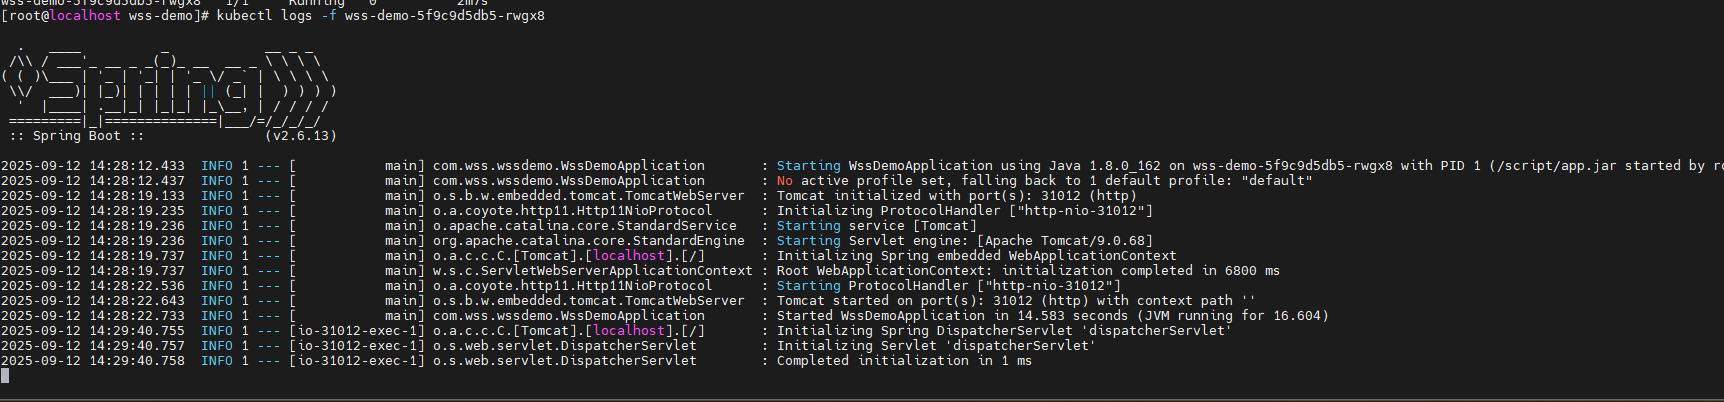
修改副本数量